-Dragonmount-Banner-Ads-1200x280.gif.ed90097d91aa5c65a5c17fab3b59c6f2.gif)
-Dragonmount-Banner-Ads-728x90.gif.a2f99d762ad611c51fbffc8b25a4efb4.gif)
-Dragonmount-Banner-Ads-320x100.gif.a233f9b759ce2a0c82ee7b9e890e85dd.gif)

Welcome back to “Fandom Flair.” This week, I’ll show you how to make an Ajah inspired quilt. Of course, like most of the projects I’ve shown, this is completely customizable! More on that in a moment. First, here’s a list of materials:
About 72 inch x 11 inch rectangle of fabric in all seven Ajah colors
About 4 yards of a backing fabric
White fabric (for the Flame of Tar Valon)
9 yards bias tape
Quilt batting for a 72 inch x 72 inch quilt
Clear quilter’s thread
Sewing machine
Scissor
Pins
Measuring tape
Step 1: Select your fabrics
I decided to attempt this project with my sister, Mavin. This quilt requires little bits of a lot of fabrics, so it made sense to divide the cost in half. We wound up purchasing two yards of each fabric (giving us our desired 72 inch length), then slicing it in half width wise to divvy it up between us. We both got 72” x 37” rectangles from all our seven fabrics. With my half, I was able to cut that 37” in half again, giving me my need 11” width and an extra 27” left over for other projects.
We selected our fabrics with patterns. This added just a bit more character and individuality to the quilt instead of having just plain cotton colors. Because of this, we selected a pattern that fit each Ajah’s theme—even if only in our minds. The blue looks lacy and regal, like my idea of Moiraine. The green is leafy, like a Warder’s fancloth cloak. The brown has swirls inside, like the chapter icon for Tel’aranrhiod, and that reminds me of Verin, who gave the dream ter’angreal to Egwene so long ago. This is where you can customize to your specific wants. Make this quilt completely your own!

For the back fabric, I wanted to have that secret Ajah incorporated, so I chose a black with white flowers. Mavin, wanting to go for comfort and personal Ajah identification, chose a yellow fleece. Once again, pick what’s special for you. It makes the finished product that much more meaningful.

For the Flame of Tar Valon, I picked a white satin I had on hand. Mavin used a white fleece to match her backing.
Step 2: Cut your fabrics
As I said, we had the intention of slicing each cut of fabric in half, giving us each a 72” by 37” rectangle. I played with several ways to set up the quilt—one version using the whole 37” of each color—but decide it would look best as a square. Since our lengths were 72”, that meant our width needed to be equal to that. Simple math says you divide the total by seven to get about 10.5” per color (including seam allowance). It’s easiest to use a rotary cutter and a cutting mat to trim the rectangles to the proper length.
Step 3: Sewing the face
I am going to call the side with the seven Ajah colors “the face,” or the front, of the quilt. The Black Ajah is, of course, the back. For the Ajah colors, I wanted to have them appear in the order that they are on the Amyrlin Stole, so I had to look at an example in canon where they are shown. The order, from top to bottom, is: Blue, Green, Yellow, Red, Gray, White, and Brown.
First take your blue and green fabrics and place them atop each other, right side to right side, with the green fabric on top. Straight stitch them together along the right edge.

When you flip them open, the blue is on the left side; this will signify up, or the top.
Next, lay the green flat and put the yellow on top, right side to right side. Again, stitch up the right side. When you open them, you have blue, then green, then yellow.
Lay the yellow flat and place the red fabric on top, right side to right side. Stitch up the right side. Now you have blue, green, yellow, and red.
Sew the gray onto the red. Sew the white onto the gray. Sew the brown onto the white.
When you lay it flat, it should look like this:

You’re done with the face!
Step 4: Backing
Since you can’t buy fabric that is 72”x72”—at least, as far as I know—you need to construct the back to be the proper size. I cut my 4 yards of backing fabric in half, giving me two 2 yard pieces.

Since the length was already 72”, I didn’t need to change that. But the width on both was 52”. I sewed the two pieces together, right side to right side, along their 72” side. This gave me a 72” by 104” rectangle. This created a lot of waste since I wanted the seam to be right in the middle, but I saved the scraps for other projects.

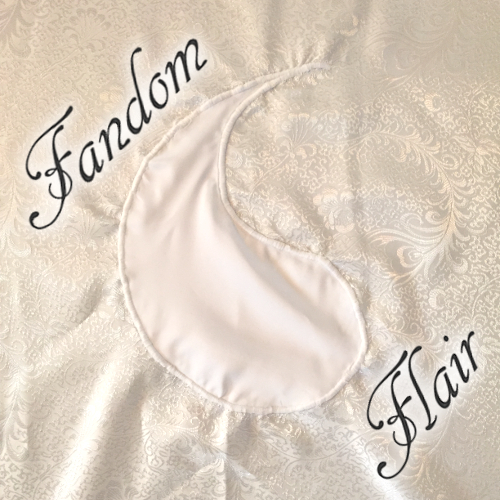
Step 5: The Flame of Tar Valon
You could just as easily add the Flame to the face of the quilt. I think it would look great either way. I didn’t want to cover up any of my beautiful Ajah fabrics, so I decided to put it on the back. I cut my white satin into a circle, then drew out the sinuous line that separates both sides.

If done correctly, this will give you two equally sized Flames. Since my satin was a bit thin, I layered both of these pieces to give me a more opaque finish.

Measure to the center of your backing fabric, both length and width. Pin your Flame in place. Stitch around the edge with a white thread, or the clear quilter’s thread.

If you’re using a fabric that frays—like my satin—I’d recommend using Frey Check on the outside edges to keep the seam clean. This can be applied before or after you sew it down.
Step 6: Stacking the quilt
With the face and the back done, we can start laying the quilt. Place the backing face down on the floor. Next, lay down the batting. Finally, lay the front of the quilt face up.

Pin all three layers together and trim the batting and backing to the same size as the face. You may see a lot of excess fabric from the backing, but don’t panic. You can save it! Never underestimate fabric scraps!
Step 7: Quilting
If you’ve seen traditional quilts, you’ve probably noticed that the layers get sewn to each other in a sort of pattern. Typically, if the quilt is made up of squares, the quilting line goes diagonal through the squares' corners. Since we’re dealing with rectangles, and ones that are divided quite clearly already, I didn’t want the diagonal stitching to be a distraction. I decided to stitch in the ditch with the clear quilter’s thread between each color divide. This hid the seam on the face, and it’s barely noticeable on the back.

One thing to note about the back. I didn’t want to ruin the beauty of the Flame, so I decided not to sew through it. I marked where the Flame was with a pin, and stopped my seam right at that line. This made the red layer and gray layer not completely sewn through, but the results are amazing! You don’t notice the seam isn’t all the way across on the face, and the Flame really stands out without seams going through it!
Step 8: Bias tape
Bias tape comes in many sizes, colors, and materials. They make a special satin bias tape for quilts—usually seen on blankets made for babies. The quilting bias tape is a lot thicker and softer than the other types. It’s a great choice for this project. However, you can also go with the double sided bias tape. This has its benefits too. For one, it’s smaller, so it makes the edges less obtrusive into the final product. On the other hand, that smaller size makes it more difficult to sew. Pick which ever one you feel most comfortable with. You can also customize the color. Mavin chose yellow to match her fleece backing. I decided to go with white because it looked the best with the Ajah colors and the black on the back.
If using double sided bias tape, the ideal way to use it is to unfold it and sew down one side first. This gives you nice, clean seams and you’re sure the catch all layers of the fabric in one go. It’s also very time consuming. I chose to sew both sides at once. It’s more difficult, but cuts the time in half.
First, I left about four inches of the tape un-sewn.

Then, using the clear quilter’s thread, I stitched down the bias tape, making sure to pinch all three layers together as I went. I stopped every five or six inches to readjust and make sure all the layers were being caught in the thread.
At the corner, sew to the edge and then back stitch a few inches. Fold the tape at a ninety degree angle and fold under the edge at a forty-five degree angle. Stitch to the edge of the angle, then with your needle in the down position, lift the foot and rotate the quilt ninety degrees to align with the next side. This is an easy way to get a nice looking corner!
When you run out of your first bias tape here’s a trick for making it look continuous. (I used about two and a half packages, meaning I had to sew the tape twice.) First, stop with at least six inches un-sewn. Take the new bias tape and the edge of the old tape and unfold all the sides.

Lay them flat together, right side to right side.

Straight stitch them as close to the edge as you can get.

Trim off and excess. Fold it back under.

Now it looks like it’s all the same tape! Keep sewing the tape down in the same manner.
Once you get to the end of the quilt, use that same trick to join the very beginning and the end. Stop about six inches from the end and cut your tape to the correct length needed.

Stitch the bias tapes together, right side to right side, and then fold it all under. Stitch the seam all the way closed.
And you’re done!


Now you have a great Ajah quilt to snuggle up with, or just to throw over the couch as a way to make visitors ask questions.
Next time, we’ll use the scraps from the quilt to construct an Amyrlin Stole! Thanks for reading!


.jpg.b7a8ed0c6c6b6db6eaa89411a06d40a5.jpg)
.gif.42a259ec4461f639cc9bc78adbc6ff0e.gif)
Recommended Comments
Join the conversation
You can post now and register later. If you have an account, sign in now to post with your account.
Note: Your post will require moderator approval before it will be visible.